Core Data入门:2-使用示例
本节会以添加/删除一个名为Person的实体为例,讲解Core Data的使用方法。
添加实体
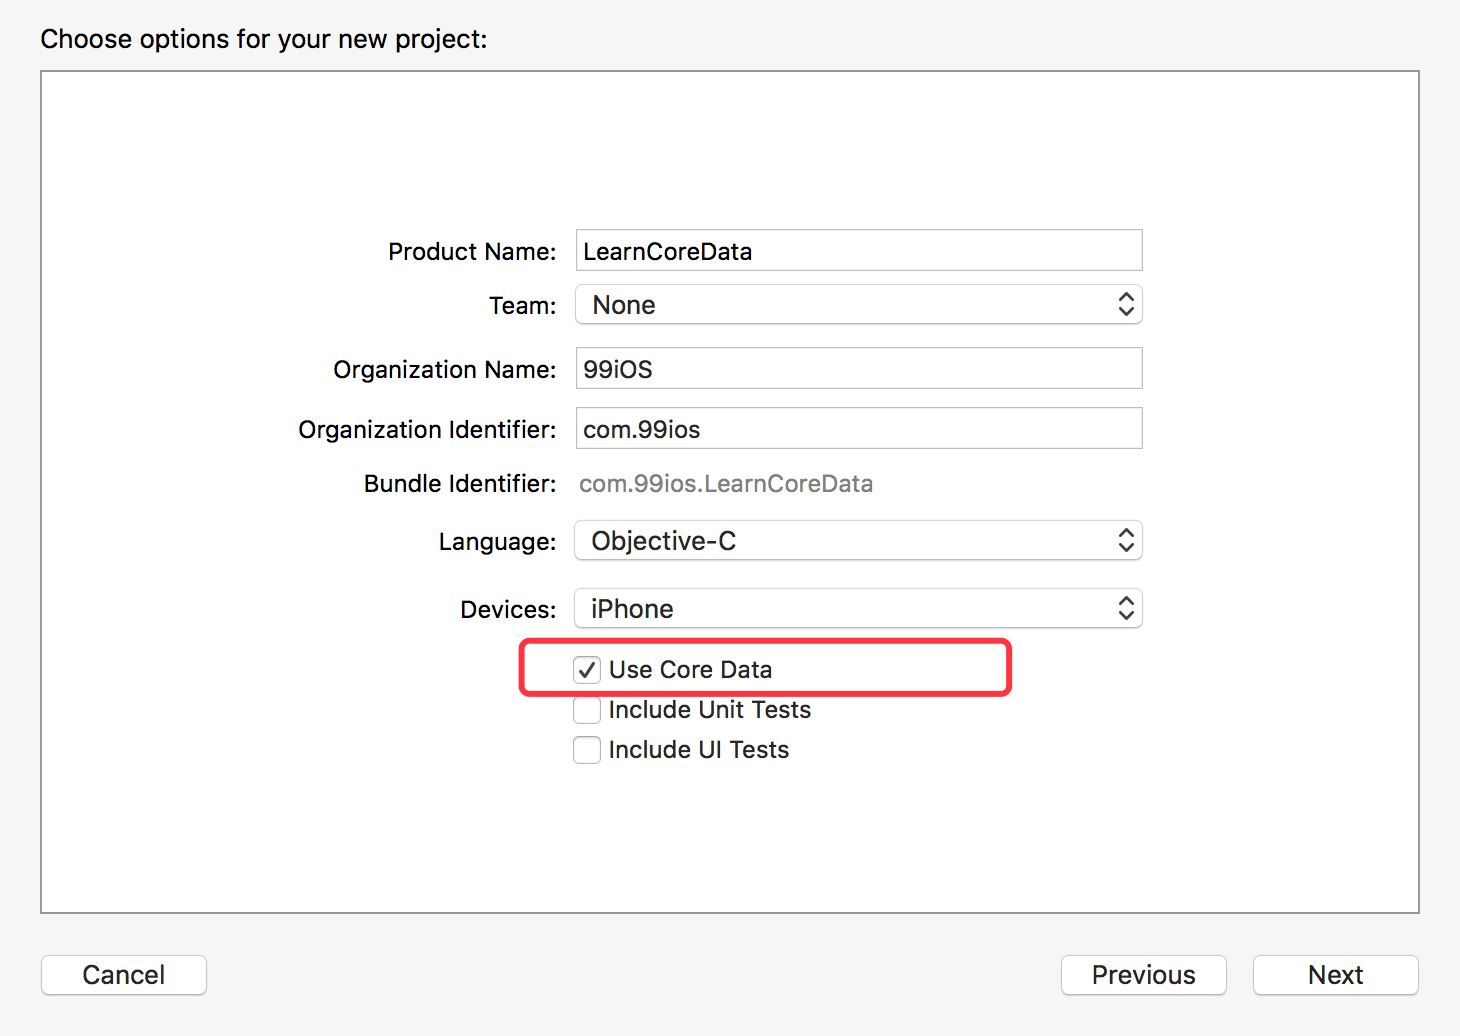
创建一个项目,在创建项目的选项中,注意勾选【Use Core Data】选项。
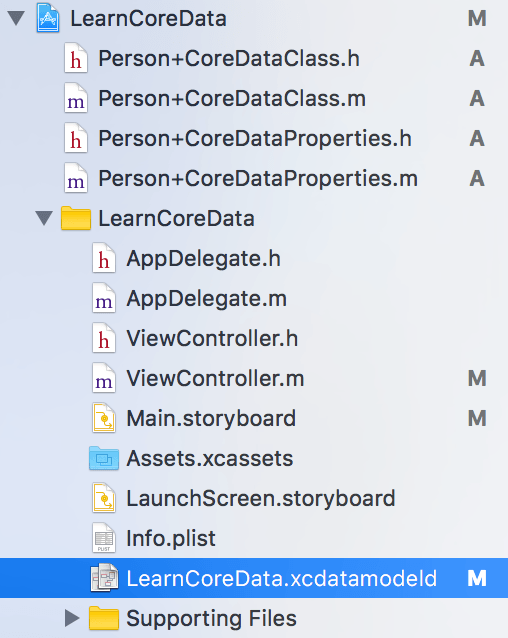
在创建好的工程里面,我们能找到一个以.xcdatamodeld结尾的文件,该文件是用于配置Core Data数据模型的文件。
单击打开这个文件,你会看到Xcode已经提供了一个强大的数据模型编辑器。

现在我们可以点击下方的【Add Entity】来添加一个实体Person。

接下来我们来给Person添加一个属性,一个名称为name的属性,其类型是字符串。

点击Xcode的Editor菜单,选中【Create NSManagedObject Subclass...】来添加实体类。

另外,在编译选项中添加CoreData.framework,并且删除Compile Sources中的Person+CoreDataClass.m,否则会编译不过。


准备工作
在ViewController.m中引入需要使用的其他类的头文件,并且添加如下的属性。
#import <CoreData/CoreData.h>
#import "AppDelegate.h"
#import "ViewController.h"
#import "Person+CoreDataClass.h"
@interface ViewController ()<UITextFieldDelegate>
@property (weak, nonatomic) IBOutlet UITableView *tableView;
@property (nonatomic, strong) UIAlertController *alert;
@property (nonatomic, strong) NSMutableArray<Person *> *personList;
@end
查询数据
在viewDidLoad方法中,添加如下的代码,可以实现当用户打开APP时,会自动从管理对象上下文中获取存储的数据,并显示到UITableView中。这里需要掌握Core Data的查询方法。
- (void)viewDidLoad {
    [super viewDidLoad];
    // 1. 获取NSManagedObjectContext对象
    AppDelegate *appDelegate = (id)[UIApplication sharedApplication].delegate;
    NSManagedObjectContext *context = appDelegate.persistentContainer.viewContext;
    // 2. 生成一个Person的查询对象
    NSFetchRequest *fetchRequest = [NSFetchRequest fetchRequestWithEntityName:@"Person"];
    // 3. 设置查询对象排序描述符,这样能使得查询的结果按照我们的需要排序
    NSSortDescriptor * sort = [NSSortDescriptor sortDescriptorWithKey:@"name" ascending:YES];
    NSArray * sortDescriptors = [NSArray arrayWithObject: sort];
    fetchRequest.sortDescriptors = sortDescriptors;
    // 4. 设置查询条件,我们这边直接返回TRUE,表示查询所有数据
    NSPredicate *predicate = [NSPredicate predicateWithValue:YES];
    fetchRequest.predicate = predicate;
    // 5. 执行查询语句,并更新tableview的显示
    NSArray * results = [context executeFetchRequest:fetchRequest error:nil];
    [self.personList addObjectsFromArray:results];
    //更新表视图
    [self.tableView reloadData];
}
添加数据
当我们创建完实体后,就可以实例化实体对象,并添加到管理对象上下文中。下方的示例代码中,创建Person实体并添加到预先创建的管理对象上下文中。
- (BOOL)textFieldShouldReturn:(UITextField *)textField {
    [self.alert dismissViewControllerAnimated:YES completion:^{
        NSLog(@"%@", textField.text);
        // 1. 获取NSManagedObjectContext对象
        AppDelegate *appDelegate = (id)[UIApplication sharedApplication].delegate;
        NSManagedObjectContext *context = appDelegate.persistentContainer.viewContext;
        // 2. 创建Person实体描述
        NSEntityDescription *entity = [NSEntityDescription entityForName:@"Person"
                                                  inManagedObjectContext:context];
        // 3. 创建一个Person实体
        Person *person = (id)[[NSManagedObject alloc] initWithEntity:entity
                                      insertIntoManagedObjectContext:context];
        person.name = textField.text;
        // 4. 添加Person实体到UITableView数据源
        [self.personList addObject:person];

    }];
    self.alert = nil;

    return YES;
}
更新数据
Core Data修改数据相对比较简单了。只需要查询出需要修改数据的Person实体,然后直接修改其值就可以了。例如,我们修改最后一行的数据。在这个过程中,由于Person类是Core Data中的实体对象,因此我们可以对对象直接修改赋值,而无需像SQLite中一样,先查询出对应的数据,然后再修改。
- (IBAction)editLastOne:(id)sender {
    NSLog(@"修改最后一行");
    Person *person = self.personList.lastObject;
    person.name = [NSString stringWithFormat:@"已修改:%@", person.name];
}
删除数据
与更新数据类似,在Core Data中,删除数据也是针对对象直接操作的。在NSManagedObjectContext类中,提供了deleteObject:方法,用于删除管理对象上下文中的对象。
- (IBAction)deleteLastOne:(id)sender {
    NSLog(@"删除最后一行");
    // 1. 获取最后一个Person对象
    Person *person = self.personList.lastObject;
    // 2. 获取NSManagedObjectContext对象
    AppDelegate *appDelegate = (id)[UIApplication sharedApplication].delegate;
    NSManagedObjectContext *context = appDelegate.persistentContainer.viewContext;
    [context deleteObject:person];
    // 3. 判断Person对象如果被删除,则从self.personList中把它移除。随后更新表视图
    if ([person isDeleted]) {
        [self.personList removeObject:person];
    }
    [self.tableView reloadData];
}
示例代码
最后编辑时间为: September 22nd , 2017 at 01:27 am
本文由 99ios 创作,转载请注明出处